How to Look Strong in Photos
Is this you? Looking washed out; lumpy; and tilting your head to the side like you’re a poof? Do you squint your eyes when you try to fake a smile? Do you think two hours of walking will be better exercise than 15 minutes of intense sprints? When taking a photo remember the following:
First, what not to do:
Stick Your Neck Out. Hold your shoulders back and make an effort to separate your chin from your neck. This keeps your skin looking smoother and prevents the double chin effect. Keeping your shoulders back will smarten up your posture, bring your chest to the forefront and makes it harder to tilt your head. Having your chest forward makes it appear bigger, and perspective wise can bring it a further or inch or two closer to the camera.
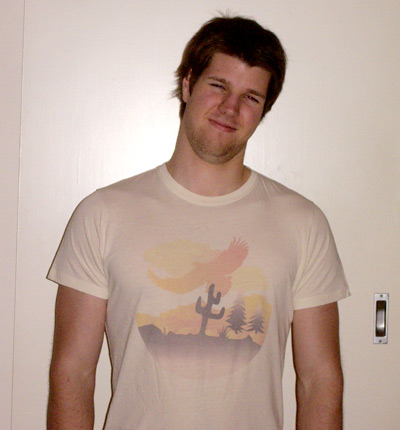
Narrow your waist. Which you can do without any exercise. Try breathing a deep breath of air into your lungs, not your stomach. This will inflate your chest, which should be sticking out already, and make your chest appear bigger. The bigger your chest looks, the narrower your waist looks. Pure optical illusion, but it works and is easier than a rowing machine.
Stand facing the light. The photographer should stand with their back to the light source, so it flows over their shoulders and onto you. When the light is behind the subject (facing the lens) it will affect the levels in the photo, washing it out and leaving you and your skin looking muggy.
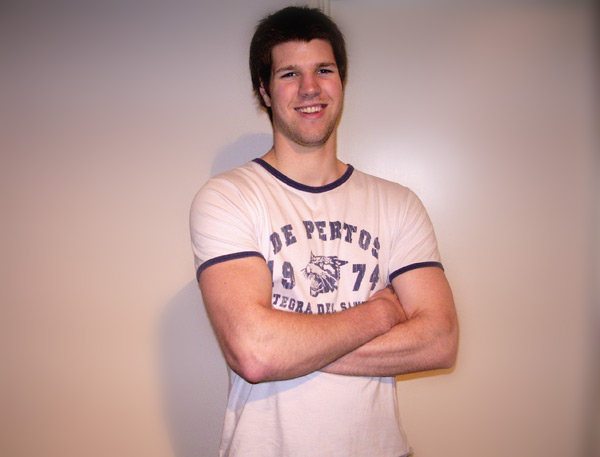
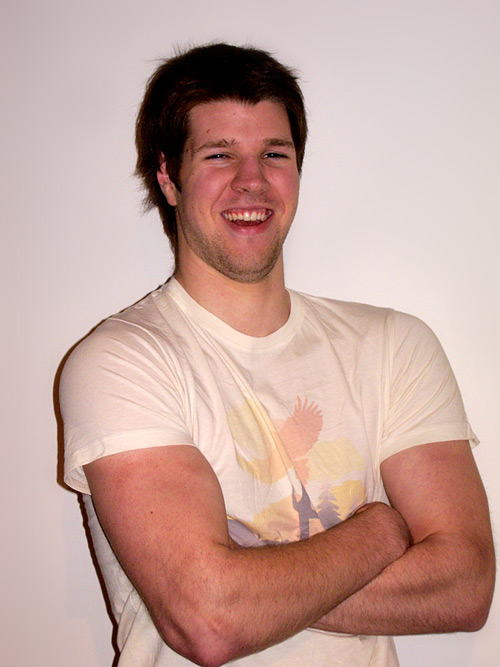
Thumb your Guns. You might not have the physical strength to even lift the camera, but you can add the impression of bigger arms by crossing them and sticking your thumbs out into your biceps from behind. Brilliant! In the real world it’s difficult for almost all men to develop large arms without having complete upper body strength. It takes about 5kg of body weight per inch on your arms (apparently.) But if you’re wearing a t-shirt and make your biceps look bigger others will automatically assume you’re built all over because they can only see your arms. Of course no one else will know about this illusion because no one else reads this far into long entries.
Don’t fake a Smile. You can look strong as well as jolly, but for all photos a real smile is better than a fake one. Real smiles engage the eyes and cheeks whereas forced ones can leave those areas revealing that you don’t really care about your step-families Sunday dinner. The best way to fake a real smile is to remember something that always makes you laugh, like that Christmas lunch where my little brother landed nads first on an outdoor tap and turned it on trying to untangle himself from it, or that scene in the Simpsons where Homer drops Bart off at the Burlesque house and says: ‘Now you're gonna do chores for that lady until you work off the damage you did. It's called "responsibility."’ Then as he drives off he knocks down the mailbox, screams and drives off.
Now you’re looking good, and have left only the ethics to consider if you should reveal why you look so healthy when you’ve been in bed most of the week with laryngitis. Or, with even less time in the gym and some time in Photoshop you can enhance yourself even more, in believable ways.
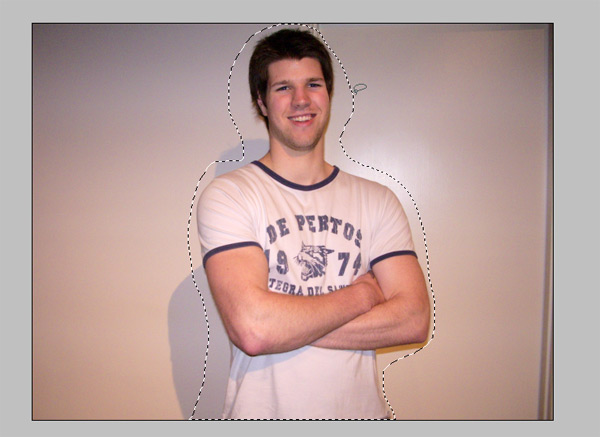
The first thing to do when you’re editing a portrait photo in Photoshop is to adjust the levels to an optimal level. Then we can begin the editing process. Using the Lasso tool, draw a rough selection with some space around the subject.
Roll over for instant BULKTEMBER
Once this is done, in the menu bar choose Select then Feather. Choose a pixel value that is quite large. For my 2816x2112 pixel photos I used a feather of 80px. When the feather is applied choose Layer, New, Layer via Copy. Or press Ctrl + J. This will copy the subject into a new layer. This allows us to edit the subject and background separately and do things like increasing the contrast at the front of the photo and blurring the background, which is the results of more traditional photography. When you turn off the background layer your image should look like this:
In the feathered layer you can apply contrast, hue/saturation and sharpen as appropriate. Then, on the background layer (particularly when the background is complex) use Filter, Blur, Gaussian Blur and select a value that is effective.
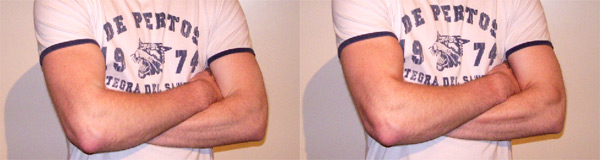
Before sharpening, the burn tool can be used to point out helpfully to anyone any definition you might have got, either from the gym or just a lot of mouse work playing with Photoshop. On mid-tones, with an exposure between 25% and 50%, darken the shadows that are already cast by the meat in your arms. The difference can be subtle, but effective:
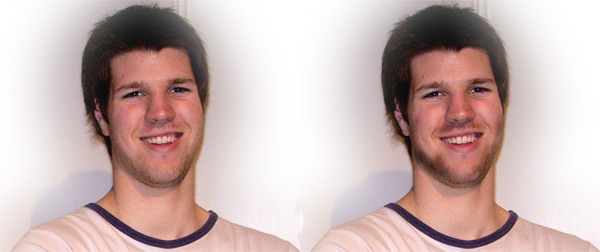
You can also use the burn tool in the same way to improve your facial hair! It doesn’t look that authentic, but it sure makes that campy smile I’ve got appear a lot more masculine.
Once the background and foreground have been improved to your liking, merge the layers and save for web as a jpeg. You’re now ready to upload to your MySpace and wait for the friend requests to roll in. Of course, there is more you can do with Photoshop, but you really don’t want to start messing around with things like the Spherize tool...

Comments